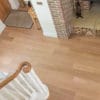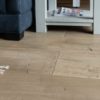


#1 - Board Type / Style
The first step for purchasing flooring is to decide on the board type. This not only includes the style of flooring, but also the construction.
Contents:
- Choice of Style
- Grading
- Construction / Type
- Fixed Vs Random Length
- Fitting Profile
- Room Suitability & Underfloor Heating Compatibility
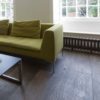
Choice of Style
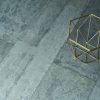
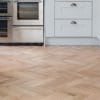
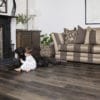
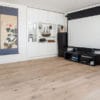
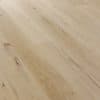
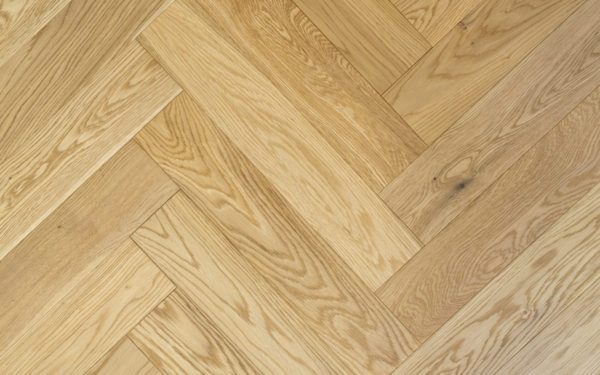
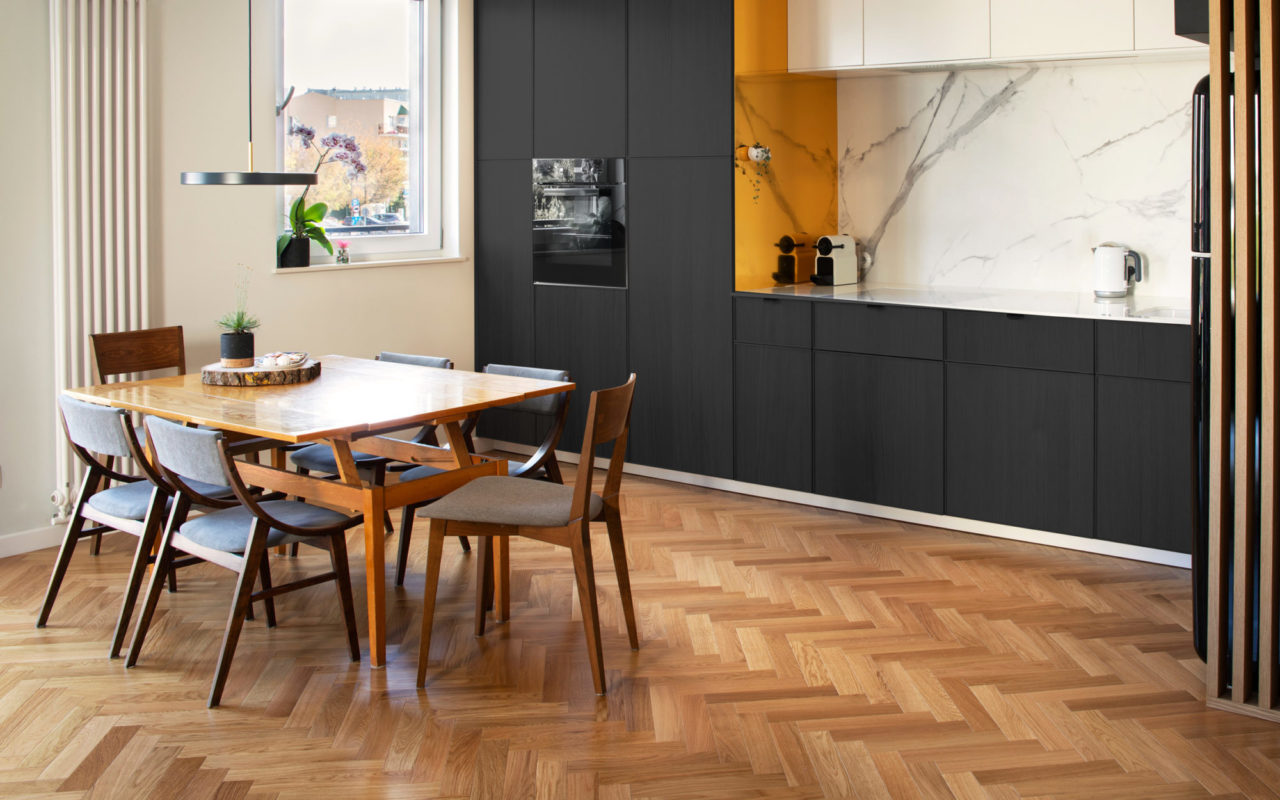
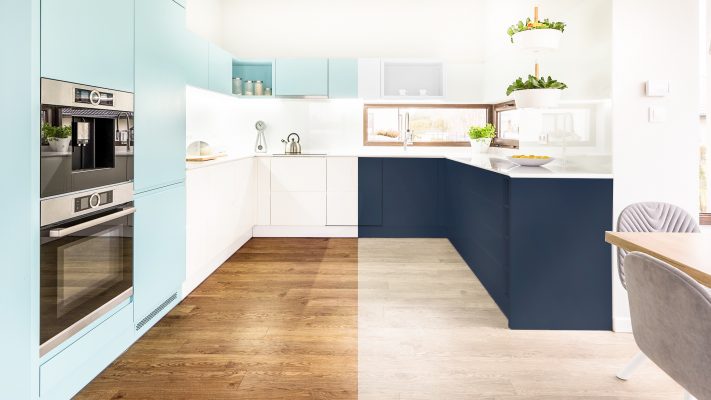
Choice of style is easy as it’s entirely up to you! At the most basic level, the choice is between Parquet or normal plank flooring. If you’re not sure which you prefer, check out our Pinterest Boards for Inspiration. From there, you can dive deeper into considering extra wide boards, long length planks, aged & distressed and much more. But remember, at this point, you’re only concern should be your personal preference.
Grading
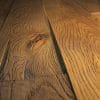
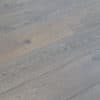
An important element of Wood Flooring is the grading. Depending on the manufacturer, names can differ but a fairly universal measurement is a lettering scale from A too D; A being the cleanest while D having the most knots and streaks. For the most part, anything below D is rejected.
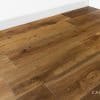
Rustic Grade wooden floors, sometimes called Character or Classic Grade, are normally a combination of C and D Grade planks. This means there are lots of natural knots and imperfections. For example, Timberhill Cottage Oak Oiled.
At the other end of the scale, there is Prime or Select Grade. These planks are A and B grades, so have few to no knots, streaks or cracks. For example, V4 A113.
Although not as common, you can buy a floor somewhere in the middle of these two grades i.e. B and C grade. You can also get what is known as a ‘Mill Run Grade’ which features A, B, C and D grade planks.
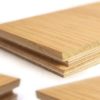
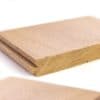
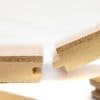
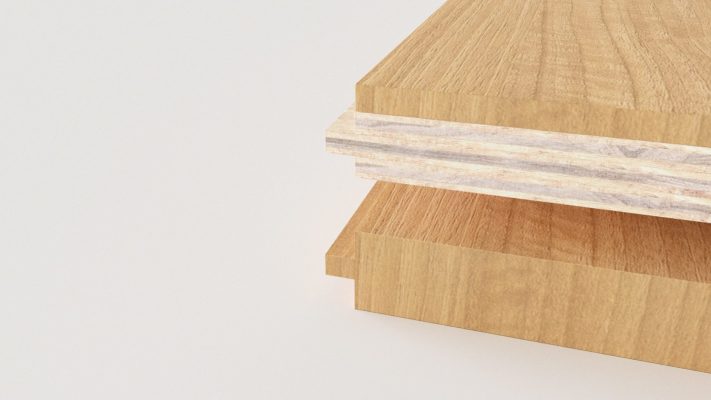
Construction / Type
The next step is slightly more complex. In regard to real wood, you can opt for Engineered or Solid construction. To summarise our full blog post, Engineered wood flooring has superior dimensional stability which means if you are looking to fit in a Kitchen or with Underfloor heating, it’s really the only choice.
Solid wood flooring, however, does have its place, allowing for more intense distressing techniques or being able to sand and re-finish several times more than Engineered floors, thus increasing its lifespan.
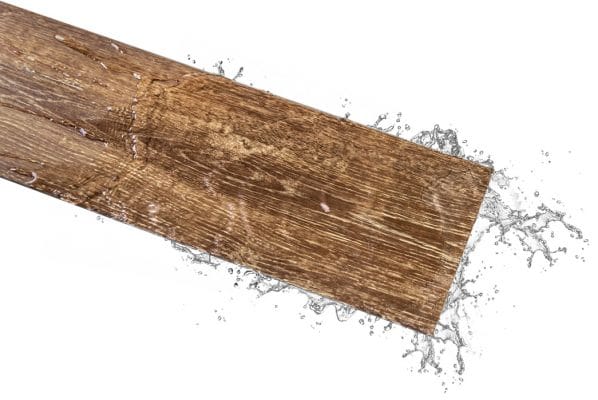
Other options to consider would be Laminate or Hybrid flooring. Laminate offers considerable savings over real wood but does sacrifice the realistic look and feel. Hybrid flooring is an exciting innovation that features an incredibly realistic appearance and texture while offering a 100% waterproof, ultra-durable floor capable of comfortably surviving in the toughest of conditions.
Fixed Vs Random Length
Most flooring products (excluding parquet) come in either Random Length or Mixed Length Packs*. Quite simply, if you desire long lengths, opt for a mixed pack product e.g. 6 x 1900mm planks with one split length (a plank is randomly cut in half to give 1400mm and a 500mm for example). If you’d prefer or don’t mind shorter lengths, random length flooring offers cost savings and a charming natural look. Click here to find out more.
*Industry-wide, it’s accepted that mixed packs are marked as 15x190x1900mm for example. Understandably, many interpret this as all lengths being 1900mm, when 99% of the time it’s actually as above and contains some split lengths. Please check your product specification for more info.
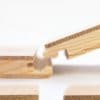
Fitting Profile
The last thing to consider in regard to construction would be fitting profile: Click Fit or Tongue & Groove. This is one of the more hotly contested debates. To summarise our full article, we firmly believe that you should not be put off your dream floor just because it doesn’t have the kind of joint you were originally looking for. Most fitters can be persuaded either way and if you are a competent DIYer, T&G is every bit as easy to fit as Click-Fit; just remember to keep an eye on the joints.
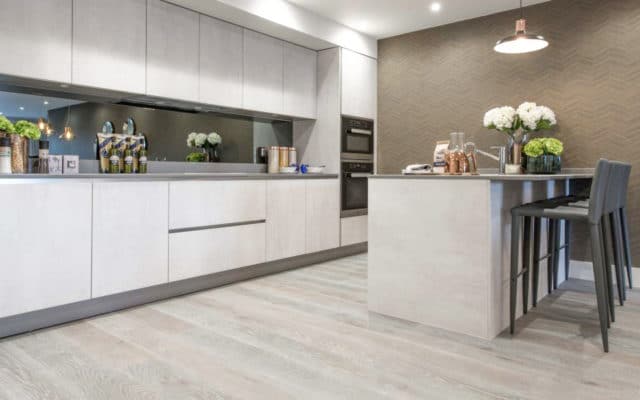
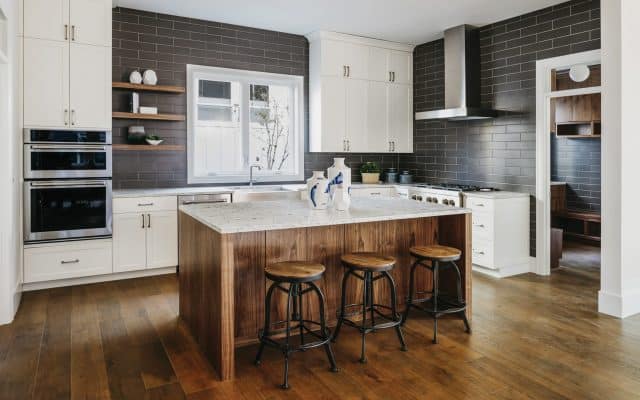
Room Suitability & Underfloor Heating Compatibility
Which floor types can be installed in which rooms is a topic of great confusion for first-time buyers. Using the chart below, you can easily check which floors are suitable for where.
|
Engineered |
Solid |
Hybrid |
Laminate |
|
|
Living Room |
Y |
Y |
Y |
Y |
|
Dining Room |
Y |
Y |
Y |
Y |
|
Kitchen |
See Notes |
X |
Y |
See Notes |
|
Bathroom |
See Notes |
X |
Y |
See Notes |
|
Basement |
Y |
See Notes |
Y |
Y |
|
Conservatory |
Y |
X |
Y |
Y |
|
Underfloor Heating |
Y |
X |
Y |
Y |
Notes:
Kitchens & Bathrooms
We don’t recommend Solid wood flooring in kitchen & bathroom spaces because the excessive moisture in the air and spillages can cause a host of issues.
Engineered wood floors are able to cope with the added humidity, but extra care must be taken to ensure spillages are wiped up immediately as longer exposure to water will also cause major problems. In Kitchen spaces, this is normally easy to keep an eye on, but Bathrooms can be trickier. We do not outright advise against bathroom installations, however, but instead leave it to you to decide how vigilant and careful you are prepared to be.
If you have young children or just for added peace of mind, we’d recommend a Hybrid product such as Hercules Hybrid, which is 100% waterproof so you needn’t worry at all!
Conservatories
It’s important to understand that conservatories normally receive a lot of sunlight so no matter the floor or the protection applied to it, with such exposure to sunlight over time the colour will fade.
We don’t recommend Solid wood floors in these situations because of the extreme changes in temperature and humidity. Engineered floors are up to the task and can still be re-oiled if after many years in the sun the finish starts to fade.
Dining Rooms
When installing any floor in a dining room or other household space that has moveable furniture, we highly recommend purchasing some sort of protection for the feet of said furniture. This will protect scuffs and scrapes whenever moving a Dining Room chair for example.
#2 - Wood Floor Finishes
Choosing between wood finishes can be very simple if you know exactly what it is you want, but sometimes it’s not quite as simple as Gloss or Matt, Lacquered or Oiled. There is a range of different finish options available in today’s market and deciding which one is right for your project can be difficult, but this guide will outline everything you need to know.
First and foremost, it’s very important to understand that the decision between surface finishes is mostly personal preference. Many often argue that lacquered flooring offers better protection than Oiled for example, but this is a misconception that even professionals still carry. We’ll dive into the differences shortly, but just keep in mind, for now, it’s down to your personal preference.
For the sake of ease we will split this guide into three sections; Effects, Finish and Additional Treatments.
Contents:
Effects – Matt, Gloss or Satin
Before we explore the characteristics of each type of finish, it’s important to understand the different effects available across the board. There are a few different names an options depending on manufacturers, but ultimately, they are Matt, Gloss or Satin. You can find these effects on either Oiled or Lacquered floors although the smoothness of a lacquered floor usually accentuates these effects more and as it normally goes unnoticed on pre-finished Oiled floors, it’s rarely mentioned in the specification. You’ll only normally find this when buying oil separately e.g. Osmo Polyx.
All these effects are fairly self-explanatory. A Matt effect doesn’t shine or reflect much light. Gloss is the polar opposite of this, it provides the floor with a sheen and also has a more slippery texture compared to Matt. Satin sits somewhere in the middle of the other two effects. It has a slight sheen and reflects a little light.
Finish – Oiled, Lacquered & UV Oiled, Natural Oiled, Hardwax Oiled
Oiled
Aesthetically, Oiled wood floors are the best finish with respect to retaining the wood’s natural character. The grain and imperfections can still be felt and seen and the natural depth and texture are retained; perhaps why you opted for real wood flooring in the first place. Because Oiled is so widely used, there are a plethora of colour options. Oiling also allows more complex finishing processes to create coloured boards with two, three or even four different layers and treatments. V4’s UN101, for example, is much more than a coat of oil.
When a wood floor is Oiled, it penetrates into the wood providing a deep layer of protection which conforms to the wood’s texture. It doesn’t form a solid layer on top as Lacquer does. There are a few different types of Oil available namely; UV Oiled, Hardwax Oiled and Natural Oiled. The basic properties described above remains the same across all these options, the main difference is how well the wood is protected out of the factory.
UV Oiled floors are oiled in the factory and cured with UV lighting. With UV Oiled wood flooring, you do not need to apply a commissioning layer of oil like you may be advised to do with other oil treatments. As you would expect, these floors are more resistant to day to day wear and tear, but often carry a slightly higher price tag. If you would like to add an extra coat of oil upon installation, one must be machine buffed in (a job for professionals). A Hardwax oil can be hand-applied after a period of time, but it would not adhere to a fresh UV Oil finish.
Natural Oiled floors are becoming less and less common mainly due to their increased cost and maintenance. Unlike UV Oiled floors, for example, Natural Oiled floors have to be left in large drying racks to naturally dry. This increases the manufacturing cost. The maintenance regime for Natural oiled floors is also fairly comprehensive by comparison, requiring an additional layer of oil upon installation and top up coats every 8-12 months or so.
Hardwax Oil floors are similar to UV Oiled in that maintenance is low. You also don’t need a commissioning layer of oil, but unlike UV oiled, you can add one if you would like extra protection upon installation. In regard to protection, Hardwax Oiled is every bit as tough as UV Oiled.
Lacquered
Lacquered Floors are incredibly hardwearing and are a popular choice. As mentioned previously, the main difference with lacquer is how it adheres to the wood. Whereas Oil penetrates deep into the floor, Lacquer forms a layer on top. While this can arguably make dealing liquid spills a little easier to deal with, the protection overall is on par with UV Oiled. While many actually argue Lacquer is better, in fact, some may reasonably argue it is worse, as the uniform layer of lacquer can make scratches easier to see while also being more difficult to repair.
Repairs
Options for repairing a lacquered wood floor are fairly limited and a lot of the time, you’d be looking to get in a professional. Most of the DIY solutions are for minor scratches. Lacquer pens are the most common tool, but they’re only really useful on small marks and scratches that aren’t too deep. Really, to repair a Lacquered wood floor you will be looking at machine buffing or sanding back and fully refinishing, as to just refinish a patch won’t work.
Because Lacquer sits on the surface of the wood, mixing Lacquers can result in a patchy appearance that leaves you with a worse finish than when you started! So, the whole floor must be sanded back as even to just do one plank won’t work as the freshly finished plank will stand out from the rest of the floor (that’s even if you are able to match the original gloss level).
When scratches do appear with Oiled floors however, you can just lightly sand the affected area and re-oil just that spot. You don’t need to refinish the entire floor or even the whole plank (assuming you have a matching oil). The scratches themselves are also not as noticeable as with Lacquered floors especially if you go a with brushed option (more on that later).
With all that said, don’t let this dissuade you from purchasing a Lacquered floor as they are so hardwearing really it’s years before you’d need to consider such repair work.
Additional Treatments
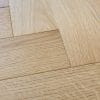
As you might expect, the scope for additional treatments is as varied as it is large, so we’ll focus on the more conventional options; Brushe, Aged & Distressed. and Sawn
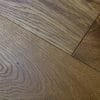
Brushed floors as the name would suggest, are wire brushed to varying degrees before being finished. This accentuates the grain and texture of the wood, creating a very appealing surface to both look at and touch.
Aged & Distressed techniques differ between manufacturers, but in principle, they are the same. Hand-distressed or Aged floors are scattered with deliberate imperfections designed to replicate older construction methods and years of wear and tear. The result is an incredibly authentic appearance perfect for refurbishments of older buildings. These floors blend right in and in the best way possible, don’t look new at all.
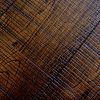
Sawn floors are cross-sawn in the factory to provide extra character to the surface of the wood. Half Sawn boards are a relatively new trend where instead of sawing across the whole width of the board, each side is lightly peppered with marks. This provides a much more natural appearance as you can see with our Cambridge Oak Sawn Floor.
#3 - Installation Methods
There are 3 main methods of installation for flooring which are: Floating, Nailing and Fully Bonding. Bear in mind though the three methods (described below) aren’t compatible with all flooring types, so consult the product specification for more information on your chosen floor.
In general, real wood floors 18mm or thicker can be installed with any of the three methods. Real wood floors thinner than 18mm can normally only be floated or bonded and the manufacturer will often provide their recommendation in the product specification. We normally suggest fully bonding especially over larger areas, but product specification aside, it’s really down your / your fitter’s personal preference.
Other floor types, our Hercules Hybrid, for example, comes with a built-in underlay, so you needn’t worry about this step at all!
Other steps included in this section are priming your subfloor (a relevant consideration for installation of real wood more so than other flooring types), and installations with kitchen cabinets and other fixed furniture.
Contents:
- Floating Floors
- Fully Bonded / Glue Down
- Secret Nailing
- Damp Proofing
- Kitchen Cabinets & Other Fixed Furniture
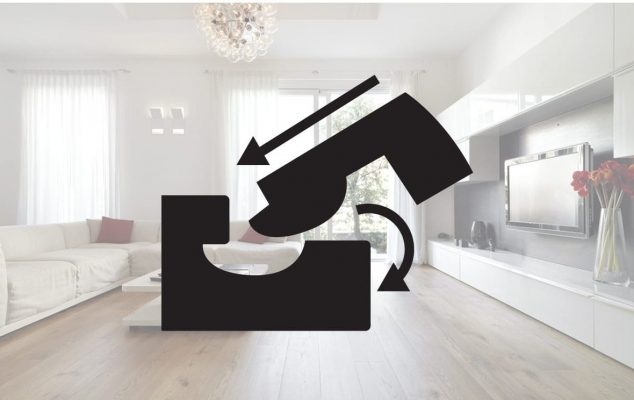
Floating Wood Floors
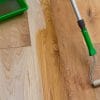
Quite simply, a floated installation is where the floor is ‘floated’ on top of an underlay. This is arguably the easiest method for DIYers. Depending on the type of fitting profile you may need to glue in between joints, but aside from that, it’s a simple and clean installation. Providing your subfloor is sound and level, you can float a floor on all kinds of surfaces including wood and concrete.
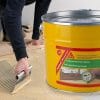
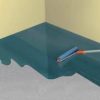
Fully Bonded or Glue-Down
This is the method we normally recommend for most installations. The reason being is that once fully cured, you have peace of mind that the floor is solid. Specially designed flooring adhesive will be flexible and allow the floor to expand and contract as it needs to, but it will feel sound underfoot. Sometimes on installations across a larger area, floated floors can have a subtle bounce to them as the underlay compresses.
The downside to fully bonded or glue-down installations are if a board slips during the install and you don’t notice until the adhesive is cured, there’s nothing you can do! That being said, with most adhesives do have a decent ‘working time’ (a period to move the boards around before the adhesive sets), so keep an eye on those joints and clamp if necessary.
Fully bonded installations can become a little messy if you’re ill-prepared, but if you have disposable gloves, some Sika Wonder Wipes and a keen eye for stray adhesive, the installation is every bit as straight forward as Floating; in some respects easier as you don’t need to glue the joints.
Bonus tip: When installing with adhesive, lay the first row or two, getting them perfectly straight and leave to cure overnight. When you come to continue the installation the following day, you then have a solid, straight base to work off, so can push the planks home safe in the knowledge you aren’t shifting the entire floor.
Secret Nailing
Nailing is an installation method that isn’t too common nowadays and is certainly reserved for professional installations only, due in part to the tools required, but also to the skills needed for a successful and safe install. It offers very similar benefits and downsides to fully bonded installations without the potential for mess. Consult your manufacturer’s product specification if you are planning a secret nail installation as most of the time, this is only advised on floors 18mm of thicker.
Nailing has its downsides however and has mostly been phased out in favour of adhesive. One reason for this is that unlike the flexible adhesive, nails don’t allow the flooring to expand and contract freely. Secondly, the nails can actually be a source of squeaking post-installation and there’s very little you can do once a squeak develops.
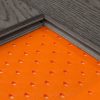
Damp Proofing / Protection
Another step to consider in regard to installation methods is priming your subfloor. Again, this step is only really applicable to real wood floors as other products are less susceptible to moisture changes. And even then, this is only really essential if moisture levels aren’t in line with your manufacturer’s guidance or if you just want to do it for added peace of mind.
Your manufacturer will detail all the necessary parameters in their installation guides. It is essential you and your fitter read these thoroughly as if not followed, it may invalidate your guarantee!
Upon checking your manufacturer’s instructions, if you find the moisture levels in your subfloor are too high, there are a plethora of products on the market that will aid in reducing / preventing unwanted moisture in your subfloor. These are known as ‘Damp Proof Membranes’ or simply ‘subfloor Primers’. Be careful though, as a primer may only act as a DPM if applied thickly or over several coats; for example Sikabond MB Primer.
For newly laid subfloors, you may find that the excess moisture is due to the floor not having fully cured. Concrete, for example, maybe fine to walk on in as little as 24 hours, but won’t fully cure for several weeks. In this situation, rather than waiting extra time for the floor to cure, you can lay a primer first, allowing you to install your wood floor and remain on schedule.
If you have a damp basement beneath your installation area, you may want to consider a DPM to keep the moisture levels in check over time. In this situation, you could use Sikabond MB Primer as a DPM or instead opt for a product such as Sikabond Rapid DPM. Here is a link to a very useful flowchart produced by Sikabond.
For floated installations, a much simpler method would be to lay a 1000 gauge polyurethane sheet to keep the moisture at bay. Most underlays will have a form of damp proof protection as well, but it’s important to double-check this and your subfloor moisture levels nonetheless.
This is a very complex topic that varies greatly from project to project. Your fitter should be able to guide you, but if you’re in any doubt please don’t hesitate to contact us.
Kitchen Cabinets & Other Fixed Furniture
What to install first, Cabinets or Flooring?
There are three schools of thought on how to tackle this age-old problem and with each option having numerous pros and cons, it’s often a topic of great confusion and debate.
As always, please discuss this topic in detail with your fitter (both flooring and kitchen) and if you are in any doubt please don’t hesitate to contact us.
Option #1
The first option is arguably the easiest which is to install the flooring from wall to wall before installing the cabinetry on top of the floor.
| Pros | Cons |
| Simple flooring installation | Cost of flooring that won’t be seen |
| Simple cabinet installation | Can restrict movement of the floor |
| A level surface allows for worry-free installation of appliances underneath cabinets | Some manufacturers advise against this method |
| Very Clean Appearance | Flooring can easily be damaged when installing the cabinets |
| Can easily change cabinet footprint | Can make for trickier repair jobs |
The Pros of this method are that it makes for a simpler flooring installation as the only edges to concern yourself with are those at the perimeter of the room. For this reason, it’s also the cleanest method in terms of appearance as there is no need for expansion gaps at the edges of the cabinets which means no trims to hide them.
This method also makes for an easier cabinet installation with the floor being all one level, the cabinets themselves become easier to construct with normally no need for modification. You’ll also have a nice level surface for any appliances that may be going in under the cabinets and needn’t worry about any clearance issues as everything will be the same height.
Downsides of this method are numerous, however. Firstly, this is only possible with fully bonded or nailed installations as the floor is not stable enough with floated floors to have cabinetry fitted on top of it. That being said, you may find your manufacturer will insist upon another option regardless of your flooring installation method as the cabinetry can pin the floor down and stop it from expanding as it ‘breathes’.
There is also the financial implication of having, at best, a few square metres hidden under the cabinets. However, we recommend pricing up all the options as you may be surprised by the results. For example, this option, although more wasteful in regard to materials, may mean that your floor fitters install the flooring in one go, so don’t need to be called back a few weeks later to trim around the cabinets.
Another argument can be made that in the event of replacing the flooring (due to flooding or a design change) it’s difficult if not impossible to remove the flooring without removing or at least damaging the cabinets.
While this may be true, chances are your flooring will normally outlast your cabinets both in terms of style and general lifespan anyway, especially as a wood floor can be sanded and re-oiled several times. By the same token however, some repair jobs will be trickier if the spot in question is pinned under the cabinets.
The flip side of this argument is that if you want to change the layout of your cabinets (either with the initial install or further down the road) you can do so fairly easily as the flooring runs throughout.
The final argument against this option is that the flooring may be damaged when installing the cabinets. While this is true, the same can be said of the alternative which is to fit the cabinets first. Either way, you run the risk of damaging cabinets or flooring just as much as each other.
Option #2
The second option is to install the cabinets first with the flooring to follow afterwards.
| Pros | Cons |
| Flooring can expand and contract at will | Trims required to hide expansion gaps at edges of the cabinets |
| Suitable for all types of flooring installation including floating | Height differences underneath the cabinets can cause issues with appliances |
| No risk of damaging the flooring when installing the cabinets | Risk of damaging cabinets while installing the flooring |
| No wasted material underneath cabinets | Cannot easily change cabinet footprint |
This option again has many pros and cons. It may not be as aesthetically pleasing as the first option but shares the simplicity in that both installations can be completed in their entirety. There is no need for fitters to come back to apply the finishing touches (save for the kickboard).
There are also no concerns with this method in regard to the movement of the floor as long as expansion gaps are correctly allowed for. As there is nothing pinning the floor down, this method can be recommended for floated installations unlike option #1.
Risk of damaging either the floor or cabinets upon installation with this method is reduced as the two never interact except for when the trims are added at the final stage of the process.
One disadvantage to consider is the height differences created by not having the flooring run throughout. Providing there is still plenty of clearance to get appliances under however, this issue is fairly easy to overcome.
Option #3
The final option is an amalgamation of the first two and could easily be considered the best method. Although more complex, it boasts most of the advantages of the other two options, without the drawbacks. This option involves installing the kitchen cabinets first but then removing the side panels and kickboard(s).
The flooring can then be installed running a few inches underneath where the side panels and kickboard(s) will be. Once the flooring is installed and has had time to settle, the kickboards and side panels can then be cut down and reinstalled.
The result is a very clean finish with no need for trims against the cabinet. Because the flooring only goes under the cabinets a few inches, there won’t be any height issues with appliances underneath the counter. You also needn’t worry about wasted material underneath the counter as with option #1.
The biggest downside to this approach is that your kitchen fitters need to come back to trim up the side panels; unless of course, you have someone else on site that can complete this.
| Pros | Cons |
| Very clean finish | More complex |
| No wasted material underneath the cabinets | More expensive |
| Flooring has more than enough room to expand | Cannot easily change cabinet footprint in future |
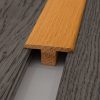
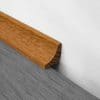
#4 - Thresholds & Trims
Mouldings are often overlooked once they’ve been fitted and usually even an afterthought during the buying process, but they are a vital element of any wood flooring installation. Not only do they serve an aesthetic purpose, mouldings allow us to have vital expansion gaps. These 10-15mm gaps give the flooring space to move as it expands and contracts with fluctuating humidity levels. In the absence of these gaps, the pressure against the flooring can cause a whole range of structural issues and without mouldings, these unsightly gaps would be on show for all to see.

#5 - Care & Maintenance
The maintenance regime for flooring varies depending on the type and finish. We therefore strongly advise you to review your manufacturer’s maintenance instructions specific to your chosen floor, but here is some general guidance on what you can expect.
General Tips
- Prevent accumulation of grit and abrasive dust which can scratch and dull the surface. Do this with regular sweeping and vacuuming and by installing barrier mats such as coir matting inside and outside all external door ways.
- Protect all furniture with felt pads to avoid any scratching with movement.
- Wipe up any spilt liquids and avoid any standing water or liquid as wood will absorb liquid and expand which could affect the stability of the floor. Any stains should be removed while wet with a clean damp cloth.
- Avoid use of any household cleaners. These can be abrasive and damage or dull the surface and can leave a dangerous slippery film.
Wood’s Good Natural Floor Care Refresher
Before a new floor is taken into use it is recommended to apply a coat of Natural Floor Care Refresher which is a natural way to add a protect sheen to the floor.
Natural Floor Care Refresher adds protection to oiled, waxed and lacquered wooden surfaces, ideal for floors and furniture. With nurturing waxes, including sustainably sourced Brazilian Carnauba palm wax, it revives and refreshes dull and scratched surfaces and is perfect for areas that require extra resistance to water and spillages.
NOTE: Always test on a small area in order to check the surface and the compatibility of the product. Do not apply to newly oiled surfaces for at least 7 days.
General Tips
- Prevent accumulation of grit and abrasive dust which can scratch and dull the surface. Do this with regular sweeping and vacuuming and by installing barrier mats such as coir matting inside and outside all external door ways.
- Protect all furniture with felt pads to avoid any scratching with movement.
- Wipe up any spilt liquids and avoid any standing water or liquid as wood will absorb liquid and expand which could affect the stability of the floor. Any stains should be removed while wet with a clean damp cloth.
- Avoid use of any household cleaners. These can be abrasive and damage or dull the surface and can leave a dangerous slippery film.
Wood’s Good Natural Floor Care Refresher
Before a new floor is taken into use it is recommended to apply a coat of Natural Floor Care Refresher which is a natural way to add a protect sheen to the floor.
Natural Floor Care Refresher adds protection to oiled, waxed and lacquered wooden surfaces, ideal for floors and furniture. With nurturing waxes, including sustainably sourced Brazilian Carnauba palm wax, it revives and refreshes dull and scratched surfaces and is perfect for areas that require extra resistance to water and spillages.
NOTE: Always test on a small area in order to check the surface and the compatibility of the product. Do not apply to newly oiled surfaces for at least 7 days.
Maintenance for these floors is straightforward. It’s advised to use a cleaner designed specifically for Laminate or Hybrid applications and avoid using excessive water when mopping (a damp mop at the most). This is because with Laminate, the water can seep through to the wooden base causing it to lose its shape. Hybrid flooring doesn’t have this issue,